Optimizing CSS with PurgeCSS (outdated)

Foreword
This article is outdated and it is for nuxt2 only.
Introduction
So we have our nuxt app on the internet, what's next? I think one thing you can try is to reduce the amount of unused CSS when you're using a type of Vue/CSS framework like Vuetify, Buefy, Bootstrap-vue etc. When you build your nuxt app for production, it will compile all the styles it finds and packages it up for production. I only use 2 classes and my CSS has over 100 classes that my site never uses, so how can we avoid this? Luckily with Webpack, we have a tool called PurgeCSS.
How will this benefit my site?
When you launch your site to production, performance is everything. You'd want your site to load as fast as possible for the user so that they don't have to wait over 3 seconds. The faster the site, the better chance for both SEO scores and retaining your user. Reducing the file size of your CSS is just one of the way to improve performance.
Install
When you are ready go ahead and install the nuxt purgecss module to your nuxt app.
$ yarn add -D nuxt-purgecss
And add the module under the buildModules config
buildModules: [
  'nuxt-purgecss'
],
Add a config purgeCSS so we can start telling purgeCSS what to keep because by default it will probably purge a lot of the styles making the site almost naked.
Here are the default settings out of the box.
{
  mode: MODES.webpack,
  enabled: ({ isDev, isClient }) => (!isDev && isClient), // or `false` when in dev/debug mode
  paths: [
    'components/**/*.vue',
    'layouts/**/*.vue',
    'pages/**/*.vue',
    'plugins/**/*.js'
  ],
  styleExtensions: ['.css'],
  whitelist: ['body', 'html', 'nuxt-progress'],
  extractors: [
    {
      extractor: content => content.match(/[A-z0-9-:\\/]+/g) || [],
      extensions: ['html', 'vue', 'js']
    }
  ]
}
Anything you add to your settings will get merged with the default, so there's no need to duplicate the defaults into your own.
Now, let's start.
How do I start?
Let's go through 3 configs that we will be using the most.
- whitelist: Here you would put the actual name class used, for example,
container. Used if the class has no patterns. - whitelistPatterns: This and whitelist are the same but the difference being you use regex to pick out patterns within the classes, like
col-2 col-3 col-4you define a pattern/^col-[1-12]$/ - whitelistPatternsChildren: With this setting, we can pick out the parent class and any other class underneath it will pass. For example,
row col-12we can define the pattern/^row$/and purge will pass any class rule that has the parent classrow.
Now I would use your current live site to make the comparisons and you would need to yarn build yarn start until you get the setup right. Remember to hard refresh the browser if you have PWA installed. Usually, with frameworks, there may be some sort of prefix. Like with Vuetify, they prefix most of their classes with v- so we go ahead and add this to the whitelistPatterns to start (/v-.*/).
Here is my final config.
purgeCSS: {
  mode: 'webpack',
  whitelist: [
    'container',
    'row',
    'spacer',
    'aos-animate',
    'col',
    '[type=button]',
    'v-application p'
  ],
  whitelistPatterns: [
    /^v-.*/,
    /^col-.*/,
    /^theme-.*/,
    /^rounded-.*/,
    /^data-aos-.*/,
    /^(red|grey)--text$/,
    /^text--darken-[1-4]$/,
    /^text--lighten-[1-4]$/
  ],
  whitelistPatternsChildren: [
    /^post-content/,
    /^v-input/,
    /^swiper-.*/,
    /^pswp.*/,
    /^v-text-field.*/,
    /^v-progress-linear/
  ]
}
Please note that with Vuetify, the v-application class encompasses most of the styles so I would avoid adding it to whitelistPatternsChildren as it will add all the colours. Of course, this setup can be further improved but for now I'm happy with this.
Results
Here is the result before purgeCSS
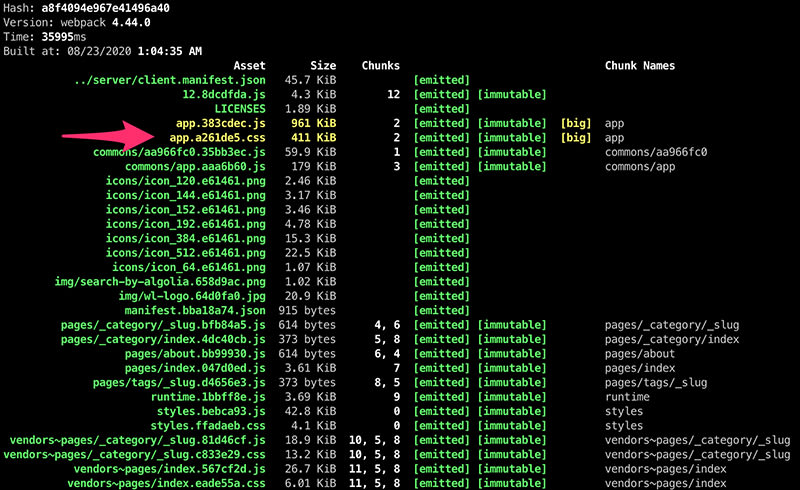
before purgecss
The app CSS file size was 411kb.
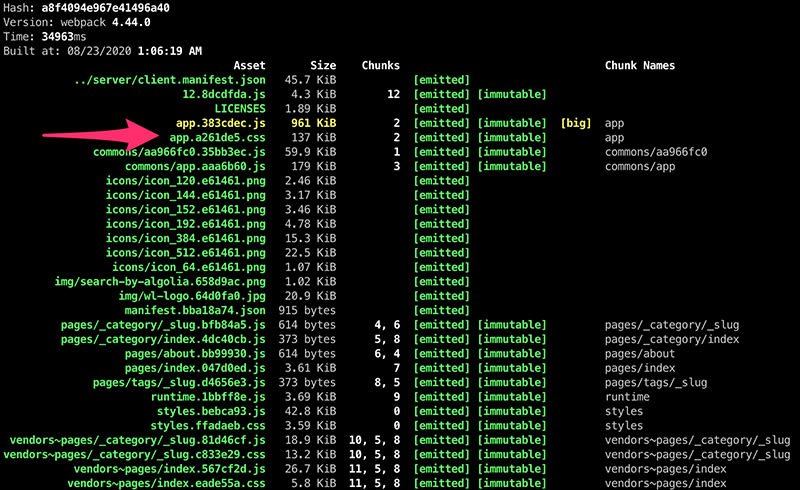
after purgecss
After using PurgeCSS I was able to reduce the app CSS file to 137kb. That's a 33% reduction! It might not seem like a whole lot but every little counts. That helps removes all the used colour classes and any other component classes that I have never used.
I hope this will help you start to use PurgeCSS and you will now need to make sure that after developing a feature, the styles remain the same between development and build.